WiFi Pod Setup Guide
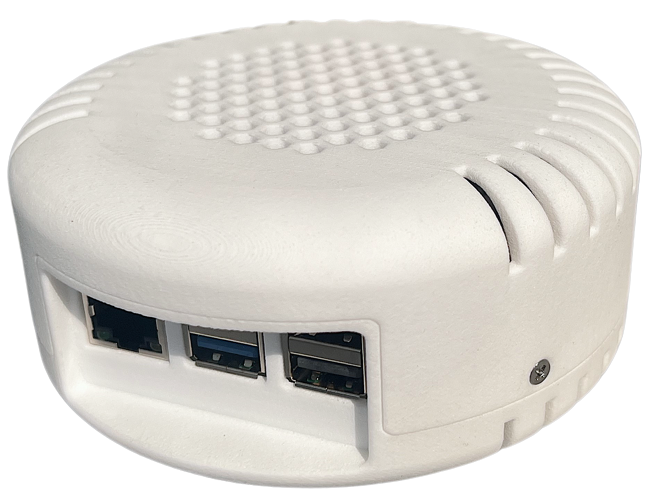
Hardware Setup
- Flash a USB disk with SPR and connect to the Pod
- Connect an Ethernet Cable for Internet Access
- Connect the Official Raspberry PI5 Power Adapter to the Pod
Setup Process
How to flash the latest spr image to your device
Download the latest spr image and flash it with a tool such as the Raspberry Pi Imager, or if you prefer using the command line:
xzcat spr.img.xz | dd of=/dev/rdiskX bs=$[1024*1024]
Be careful to make sure you identify your removable drive correctly.
Confirm the name of your disk by running fdisk -l, if its a sd-card it will propably be /dev/mmcblk0.
When this is done, boot up your pod & check out this video for how to install spr, or follow the detailed guide:
Detailed step-by-step guide
Connect to spr-setup
Start by connecting to the spr-setup open network and navigate to https://192.168.2.1. Your browser will ask you to trust the self-signed certificate, click proceed. You can also try visiting the setup domain name https://spr.setup.lan
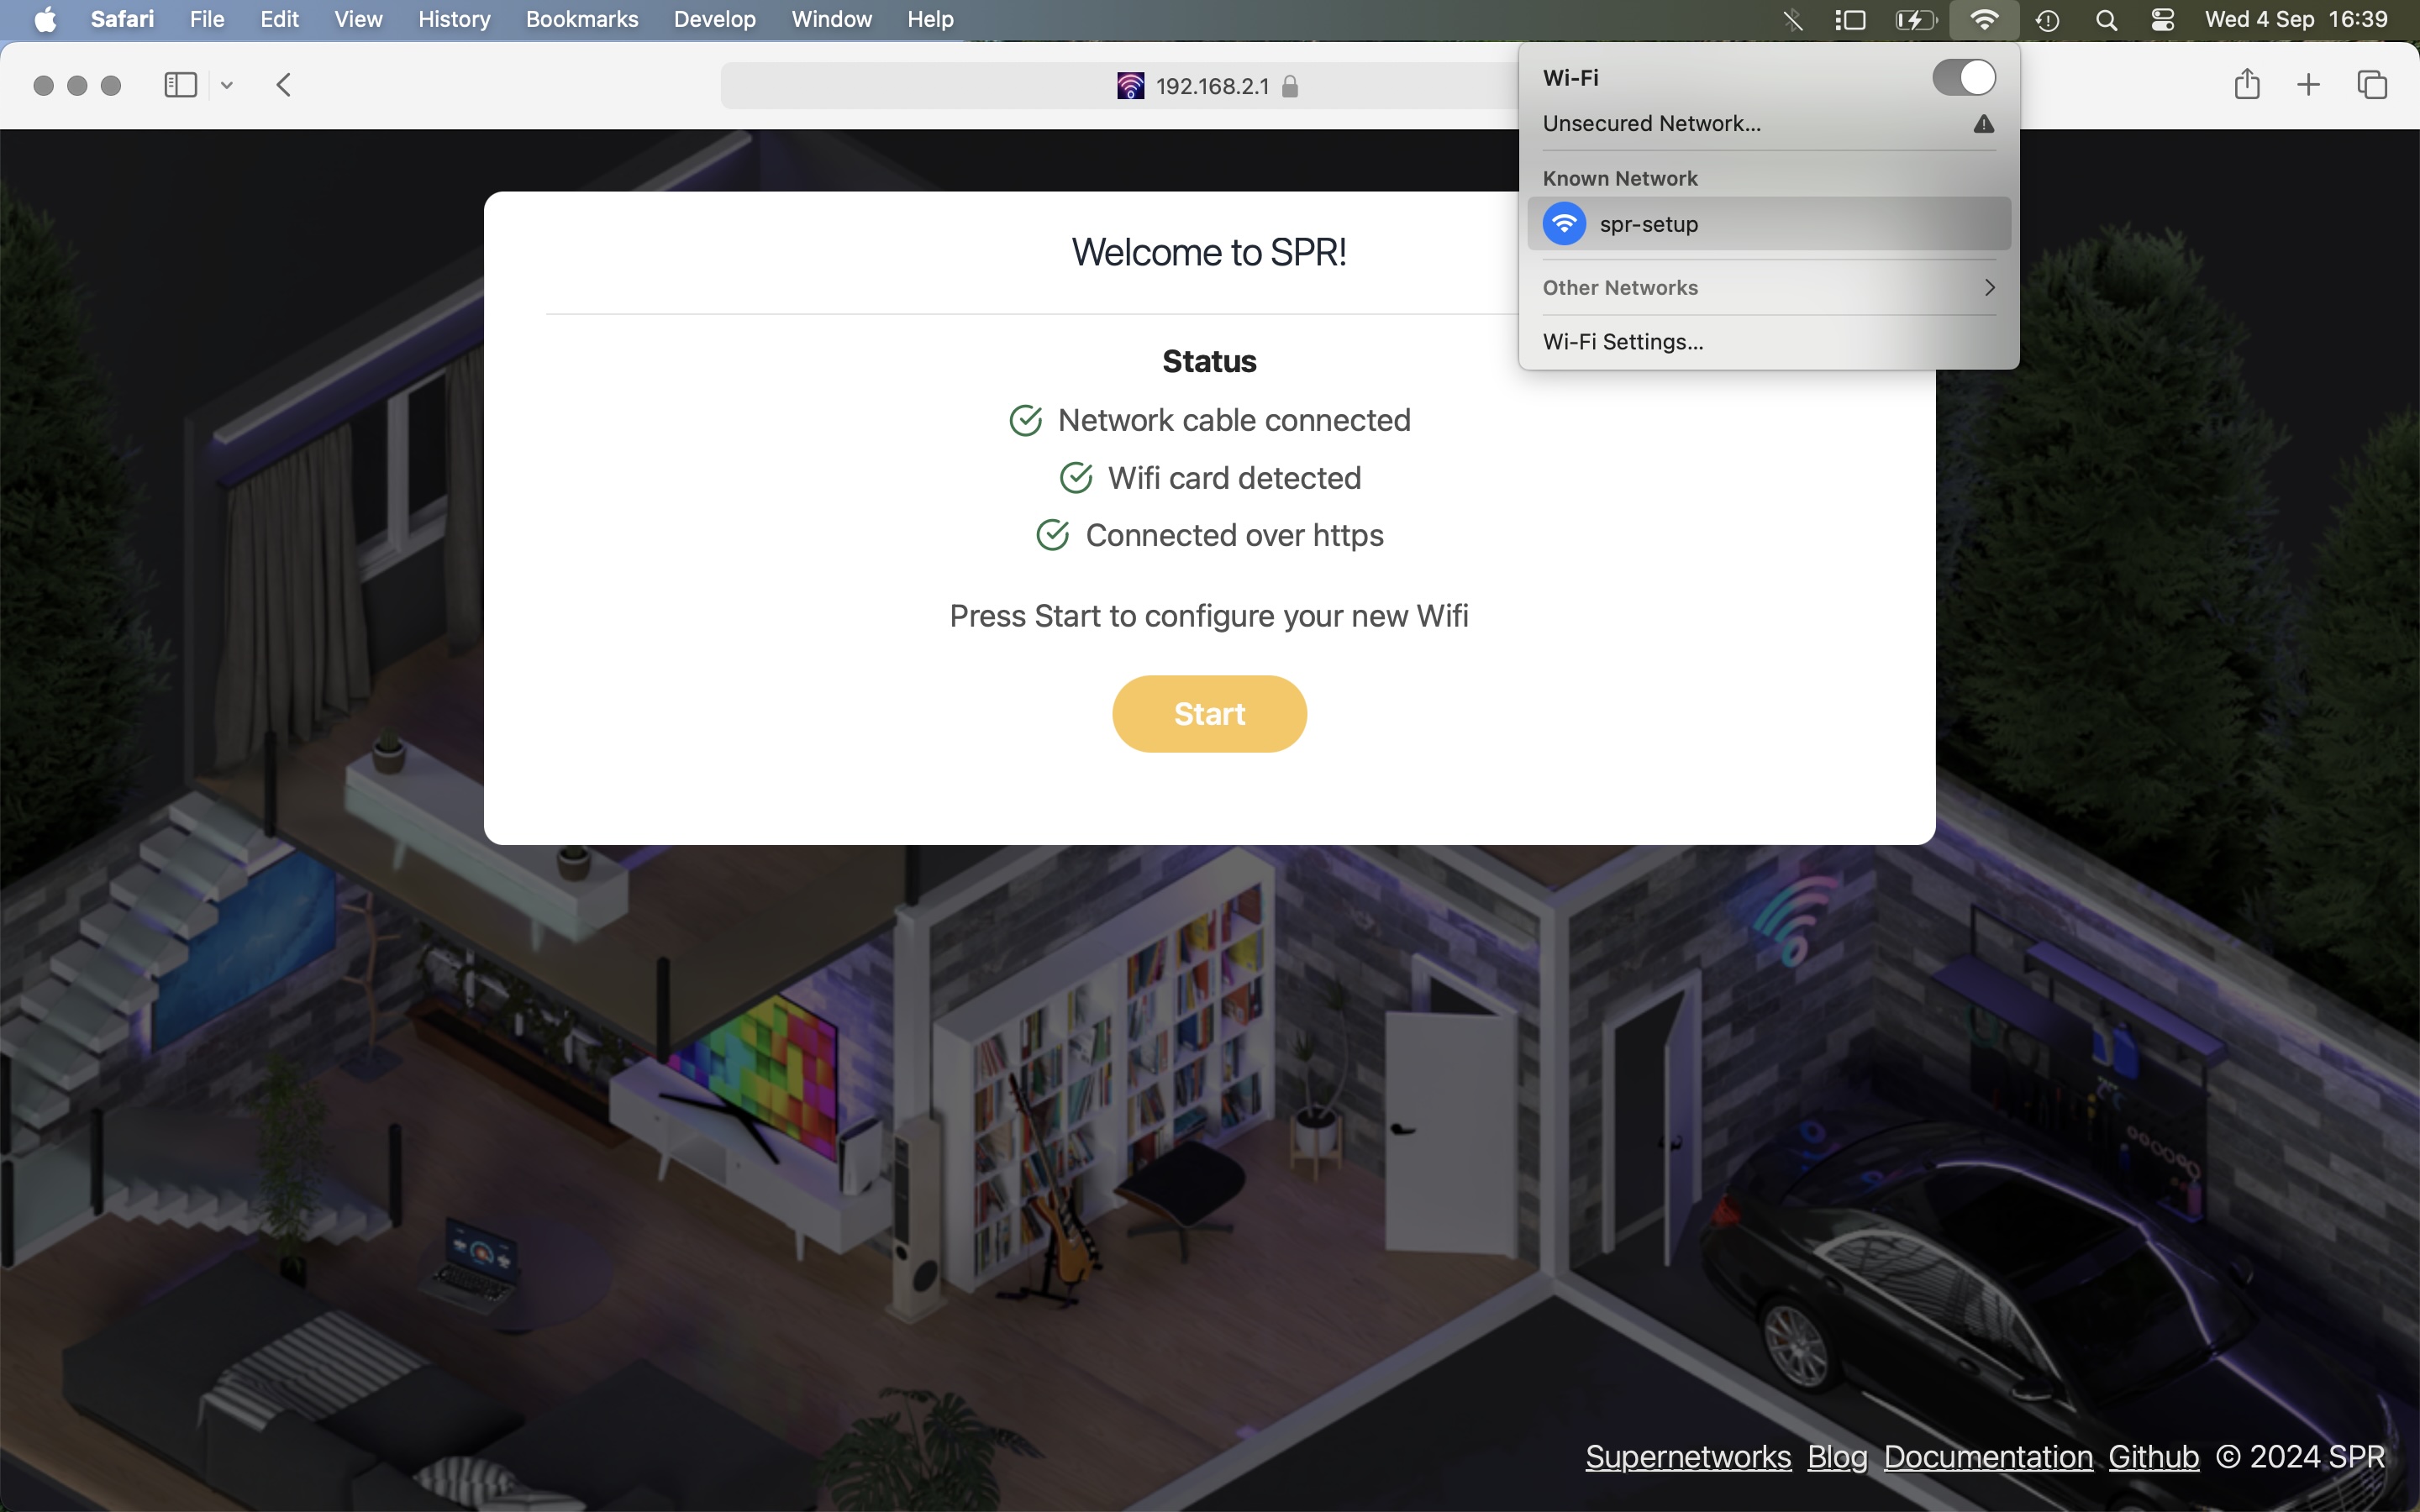
Some checks are made here to confirm everything is good to go. Press Start to configure your new WiFi.
If you dont have a network cable connected for uplink this is fine. After the setup is done you can configure a wifi client for internet access.
Setup WiFi
Select a name for your new WiFi network, your current country code and an admin password. The defaults for the other options is recommended.
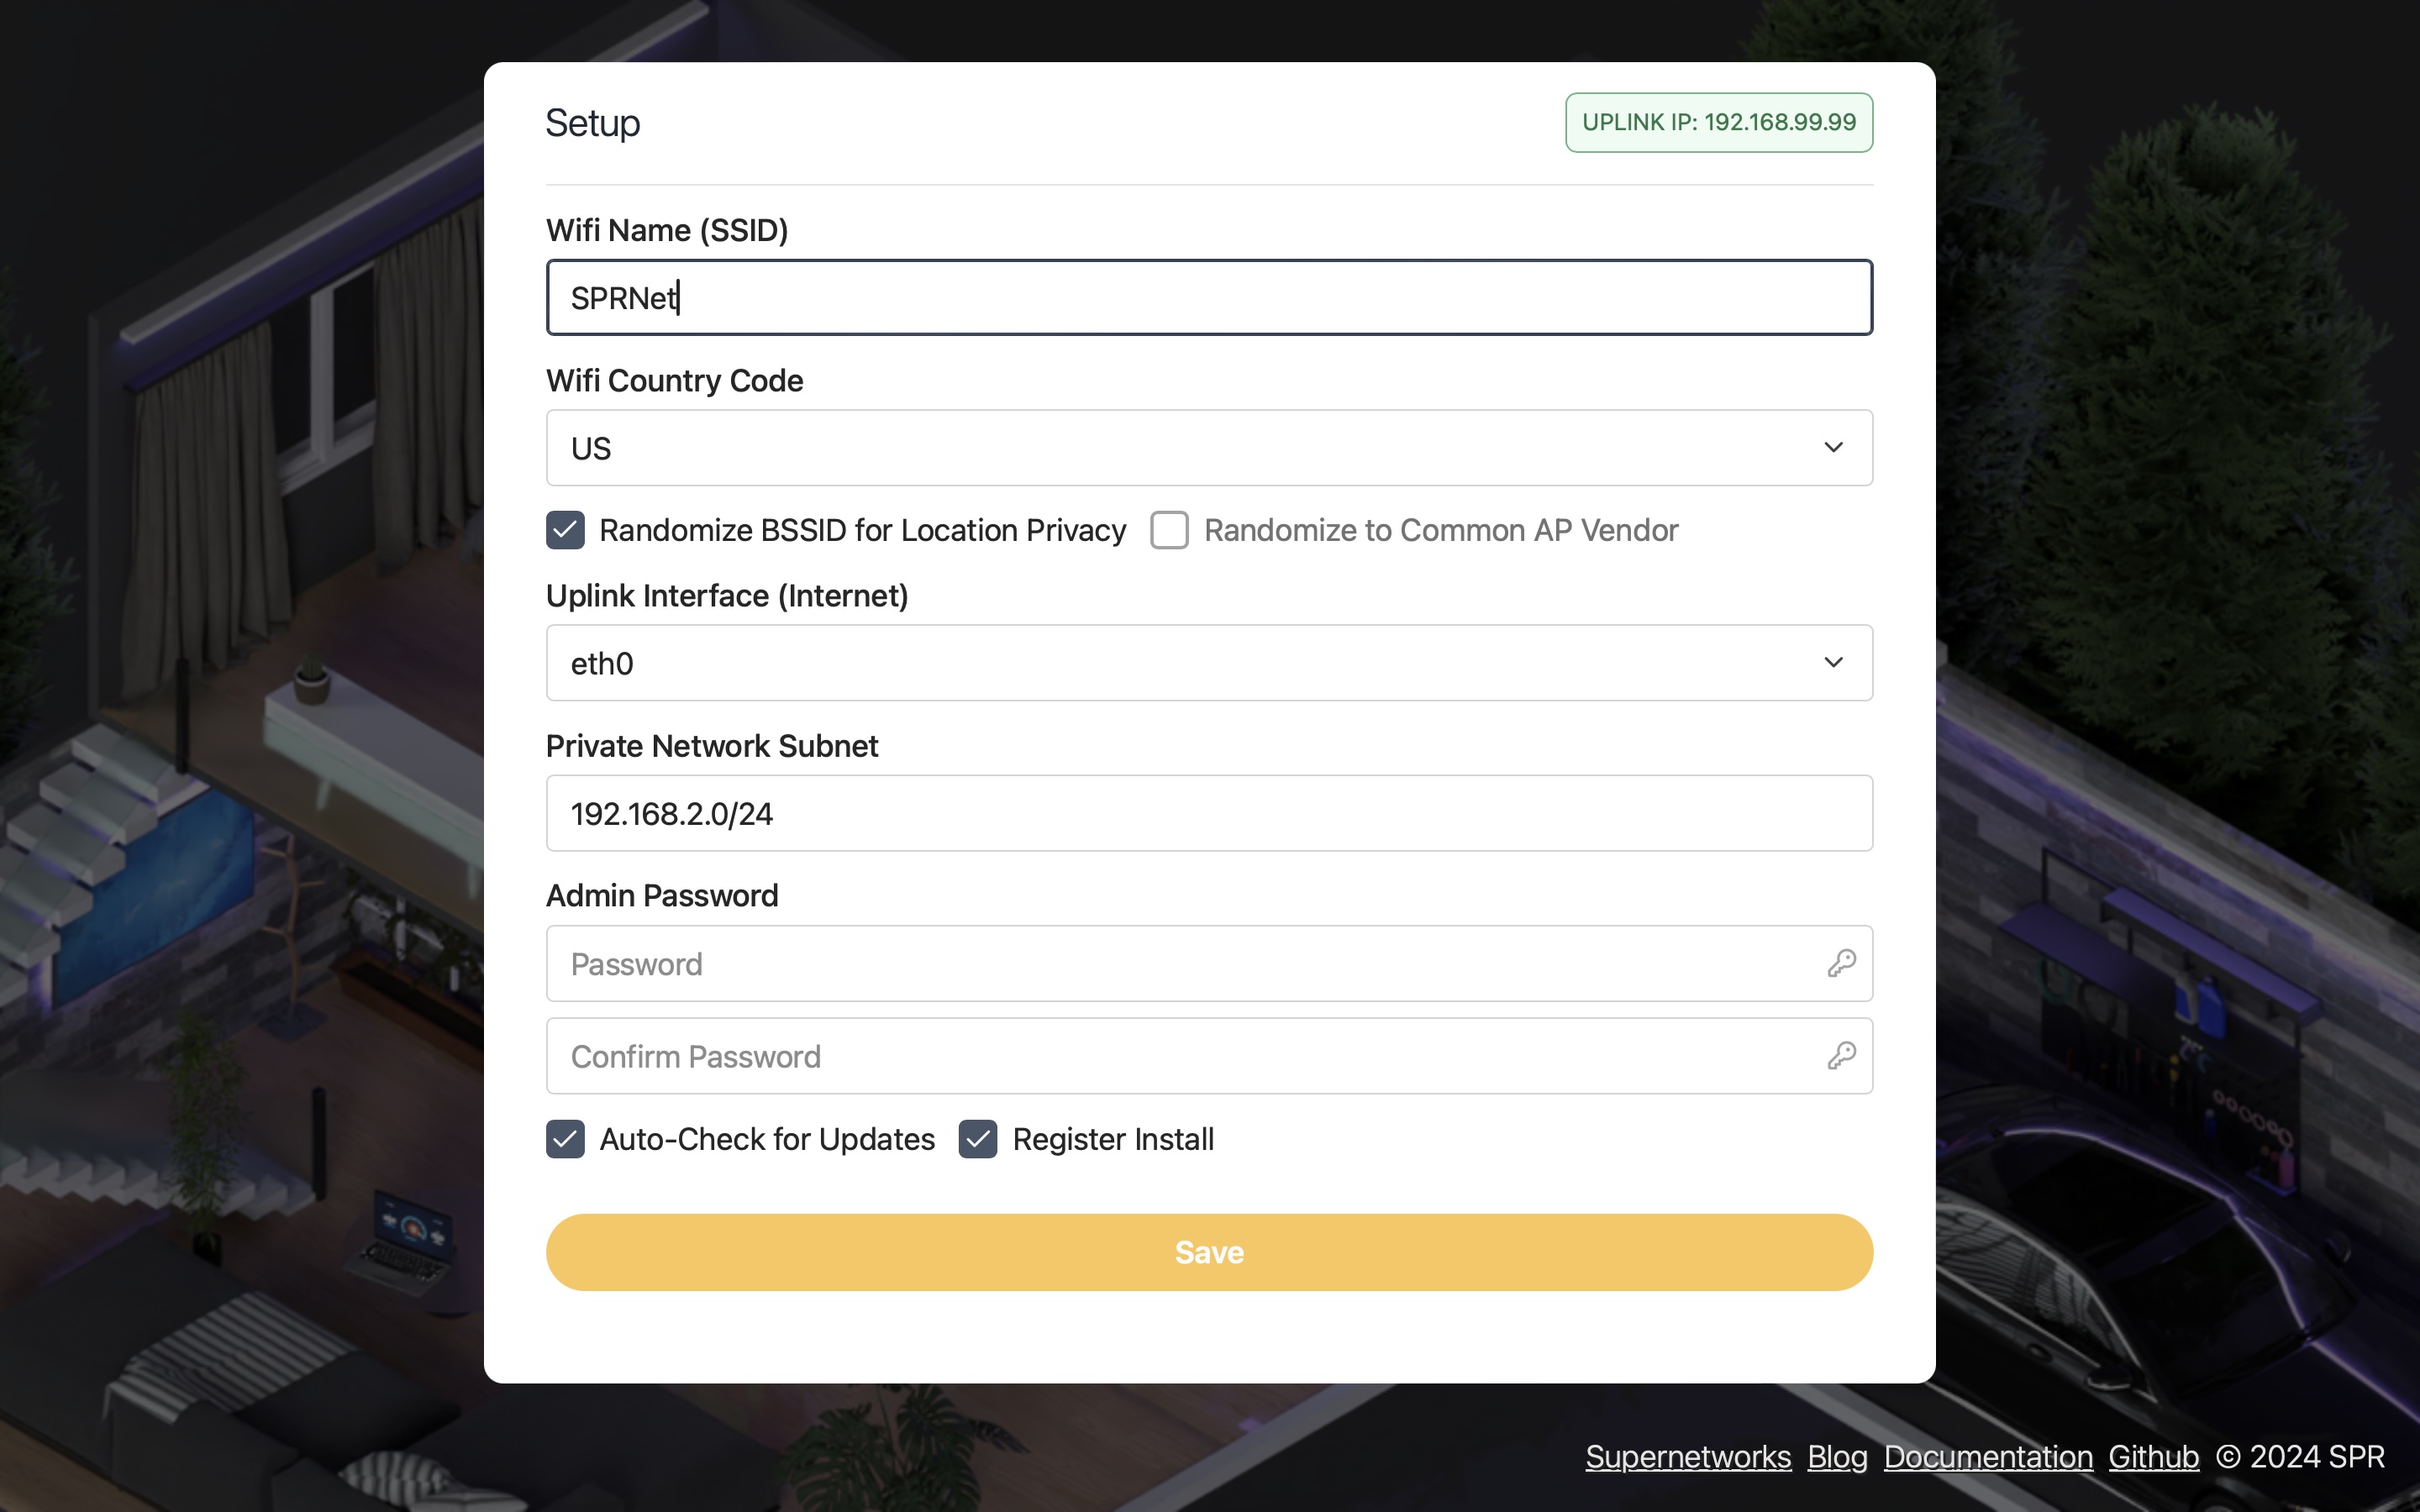
Your uplink IP address will show at the top right, spr will also be reachable here or @ https://spr.local if this is connected to your local network.
If you plan to access internet over wifi, this can be configured under Network -> Link Settings after the install is done.
Add your first device
The WiFi network will start and should be available within 30 seconds. Pick a passphrase or generate one for you first device:
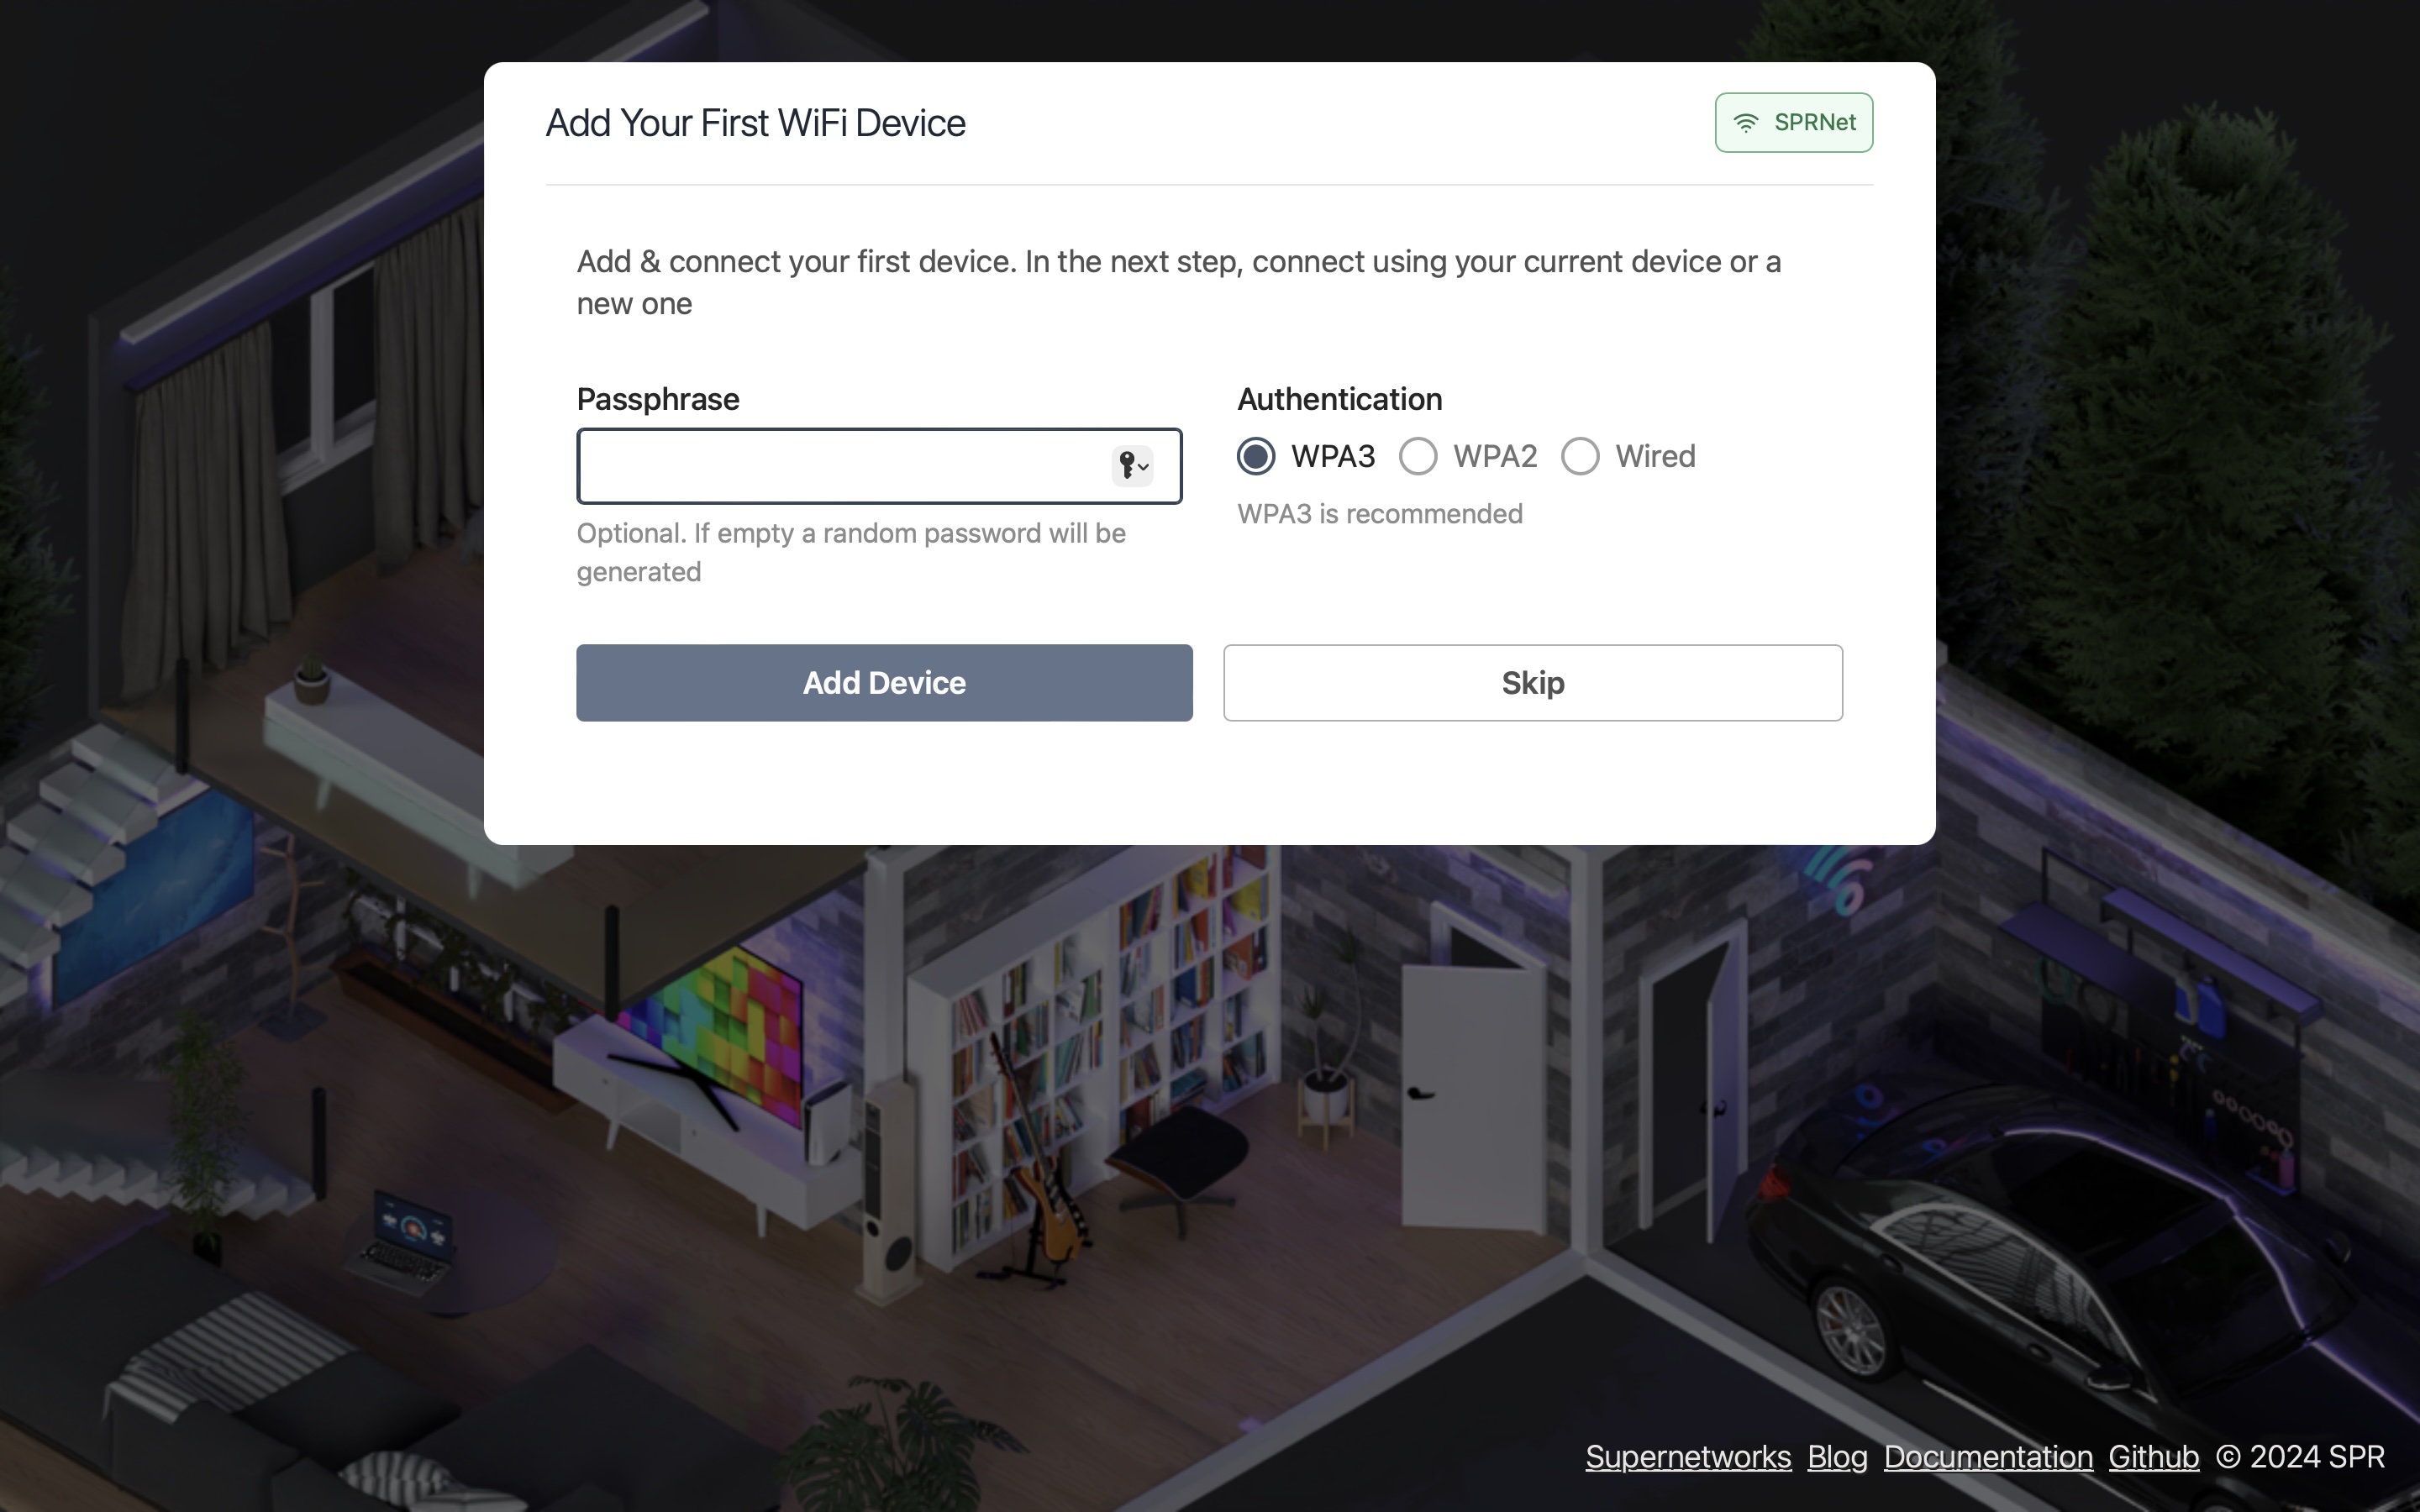
WPA3 is recommended and should work for most devices. WPA2 can be used if you have an older device.
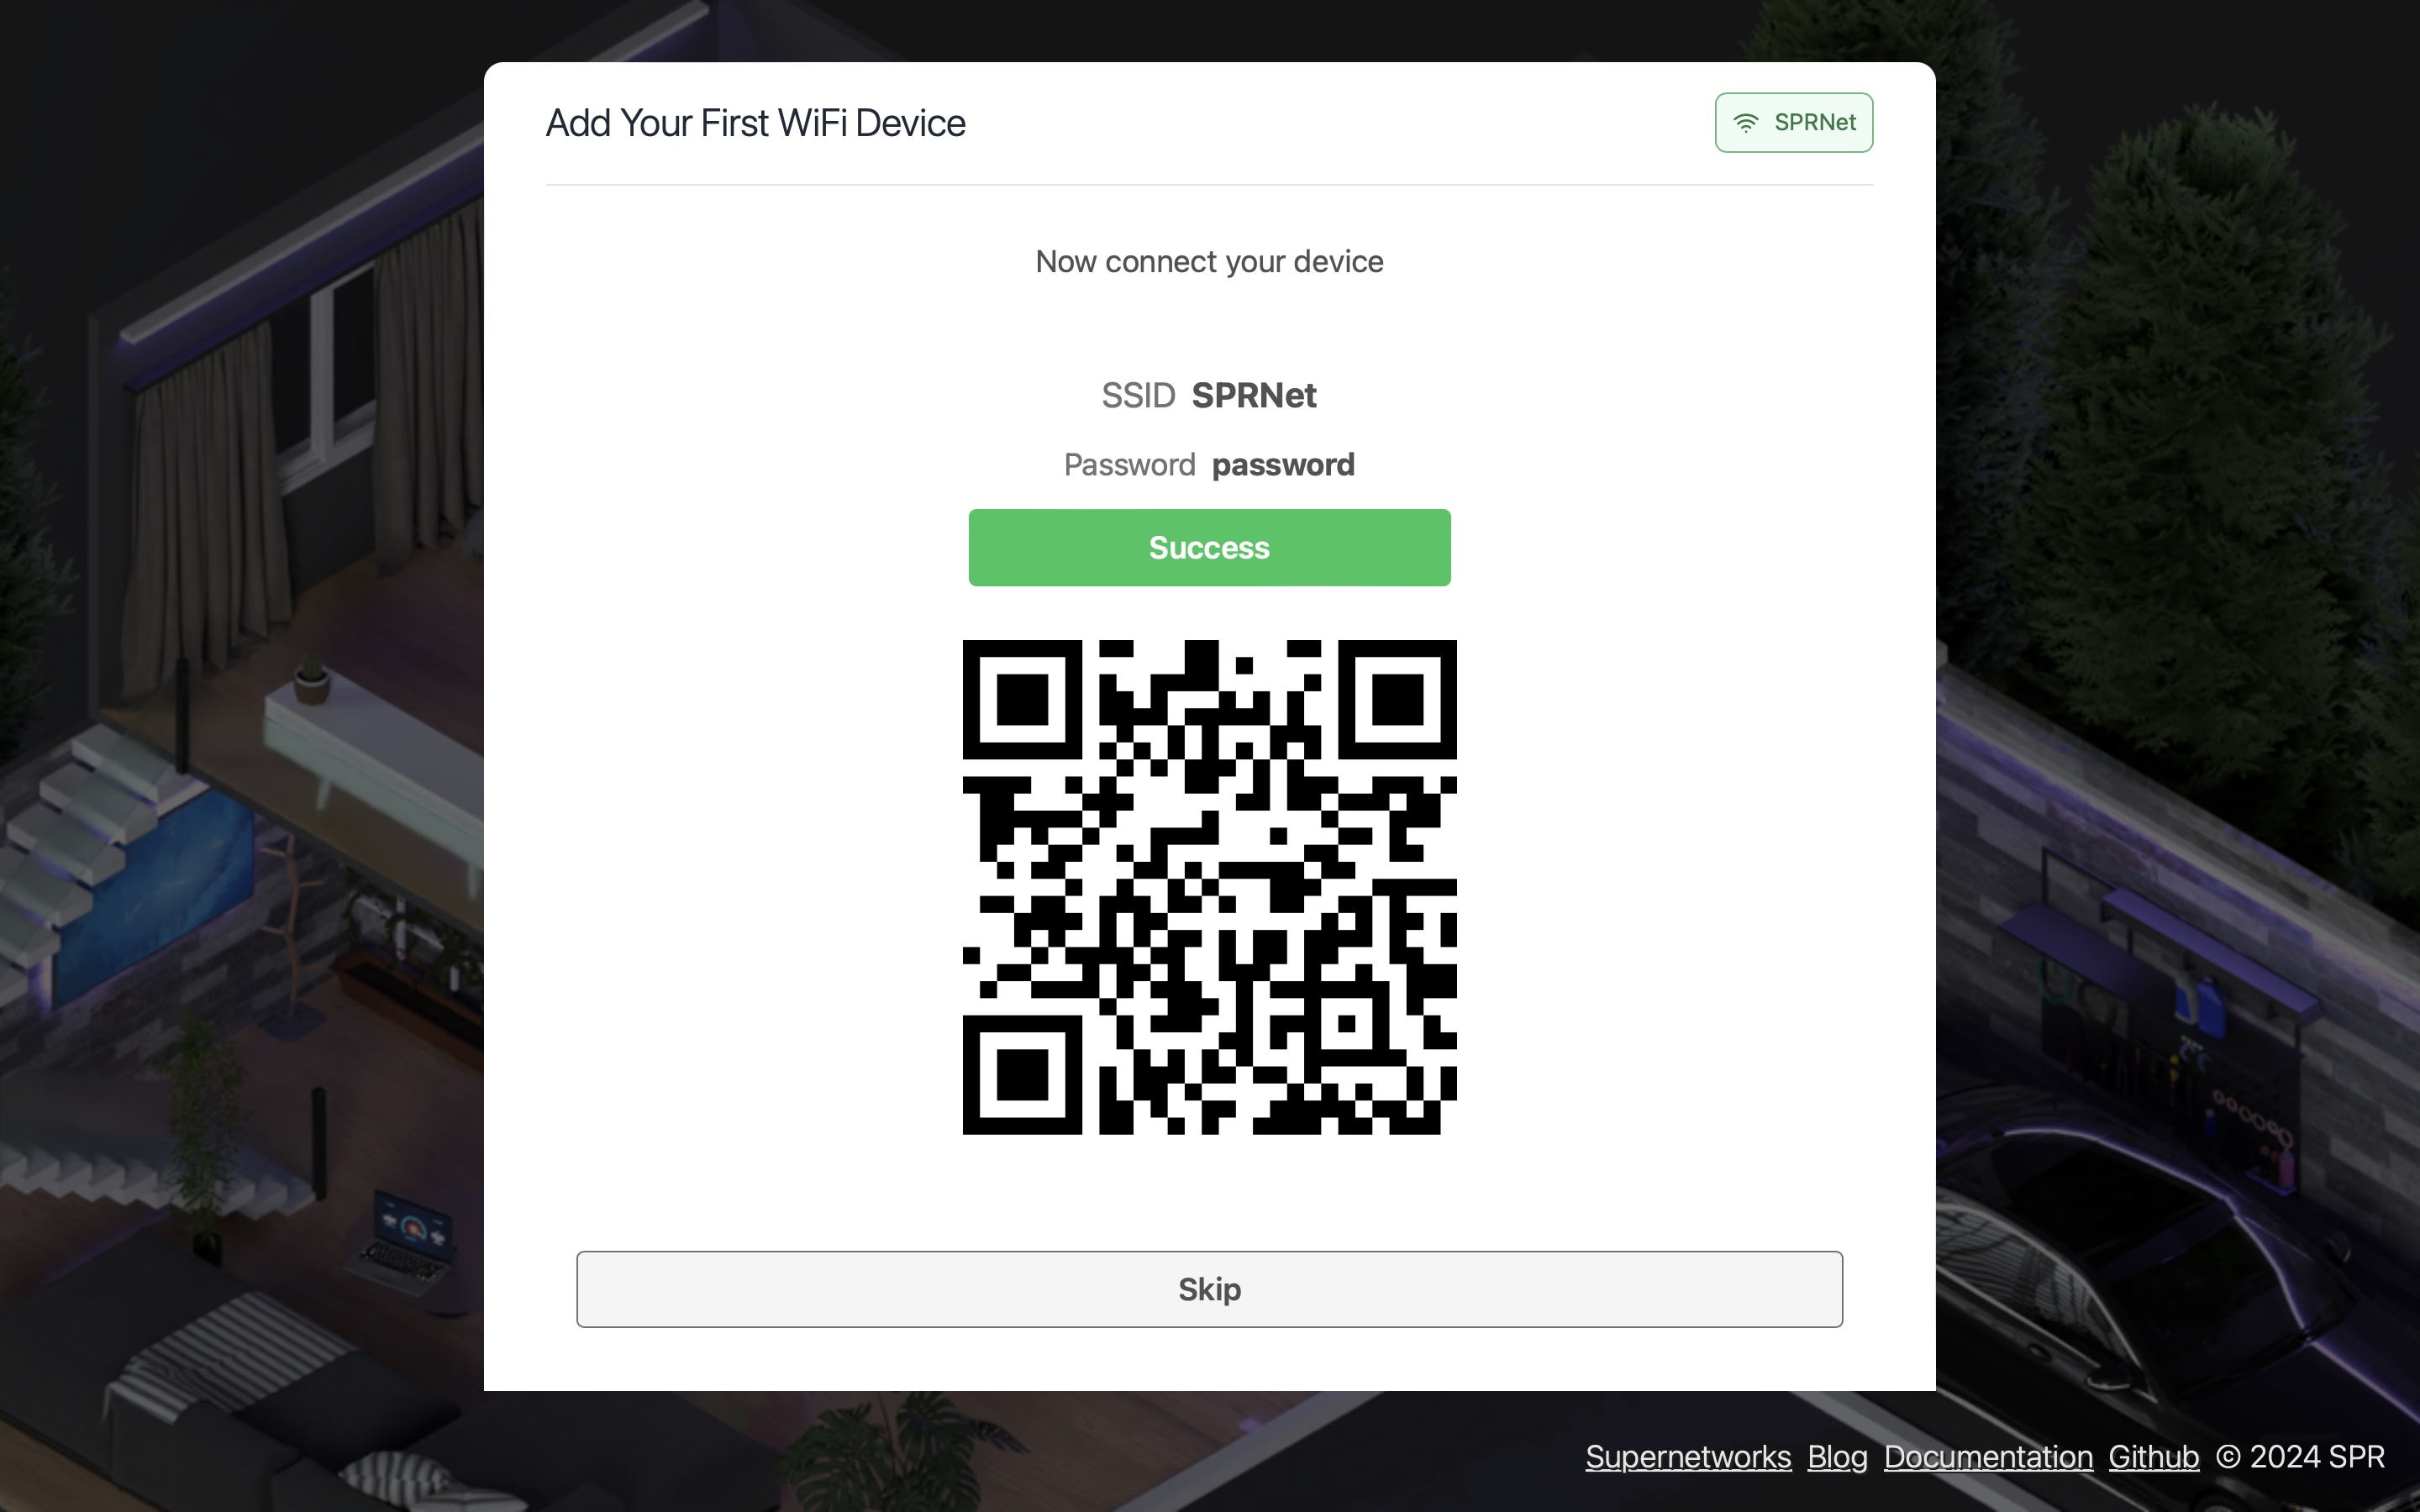
Connect your device
Now connect your device to the network using the passphrase from the last step:
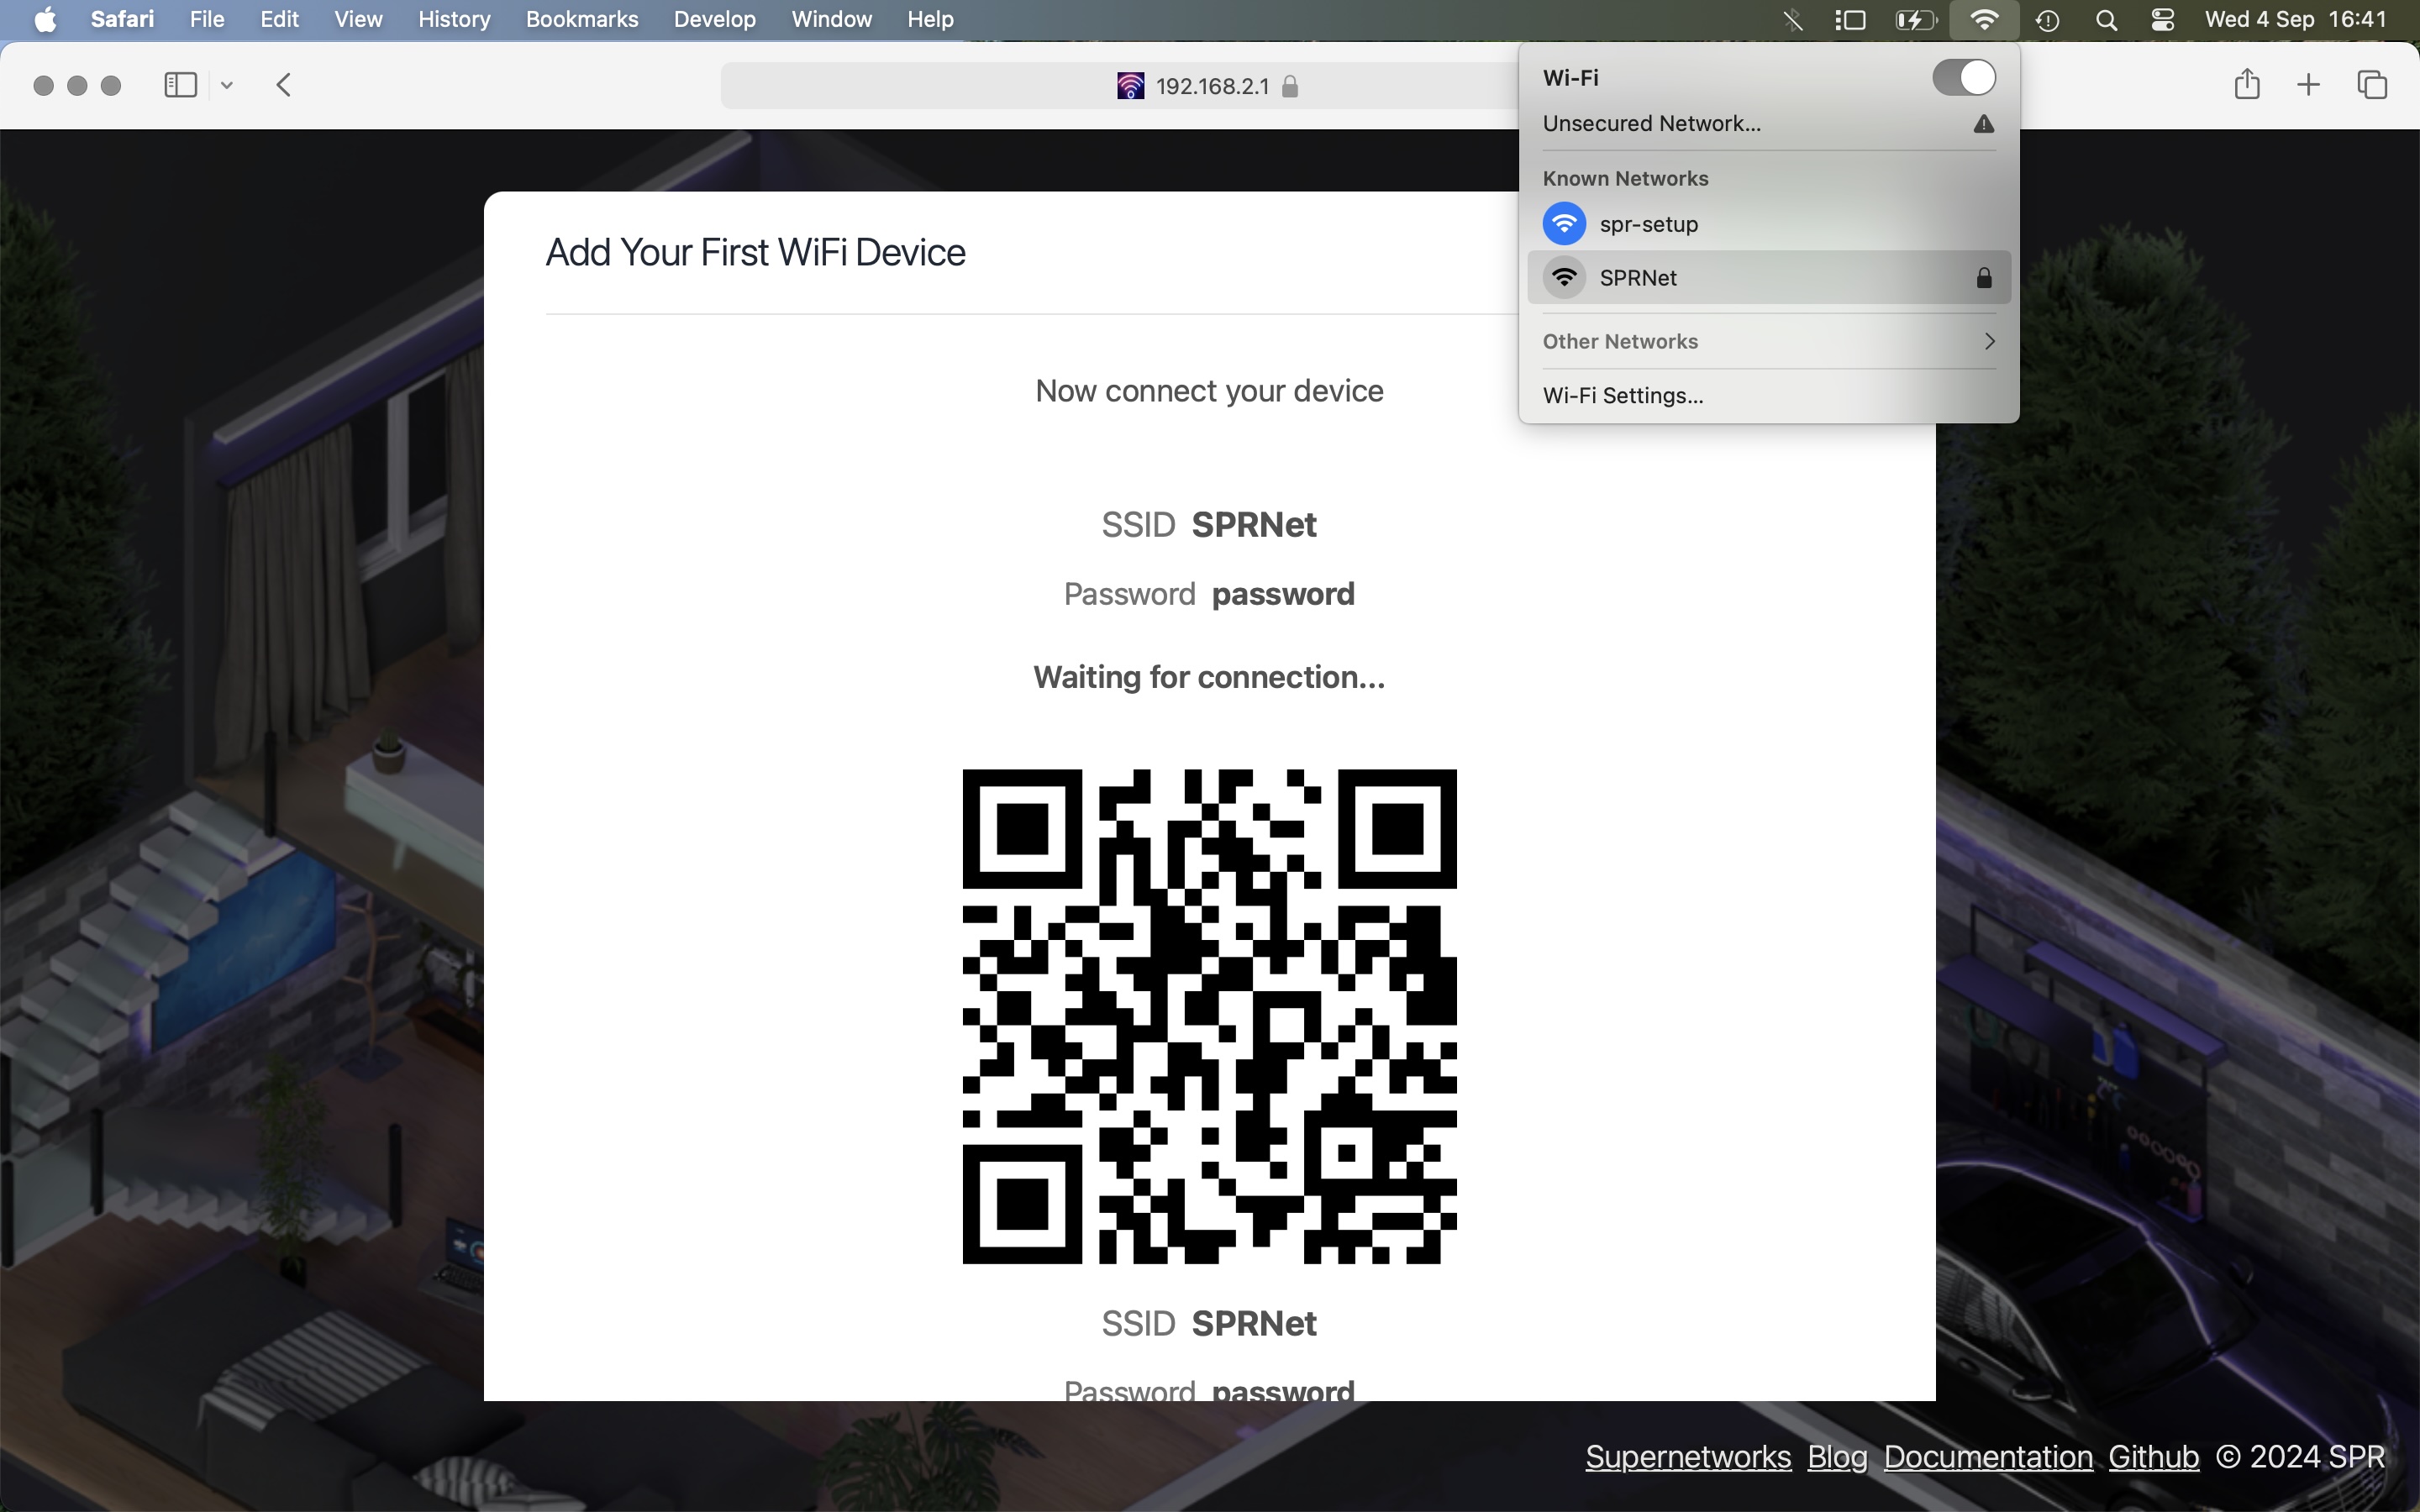
The installer will verify that the device have connected successfully:
If you picked another subnet than the default (192.168.2.0/24), make sure you are connected to spr-setup wifi to continue the install. If you fail to connect or have another subnet, press skip to configure the device over lan @ https://spr.local or your uplink ip.
When you have connected successfully to spr, the specified password can only be used from that device. Read more under device isolation or Manage Devices.
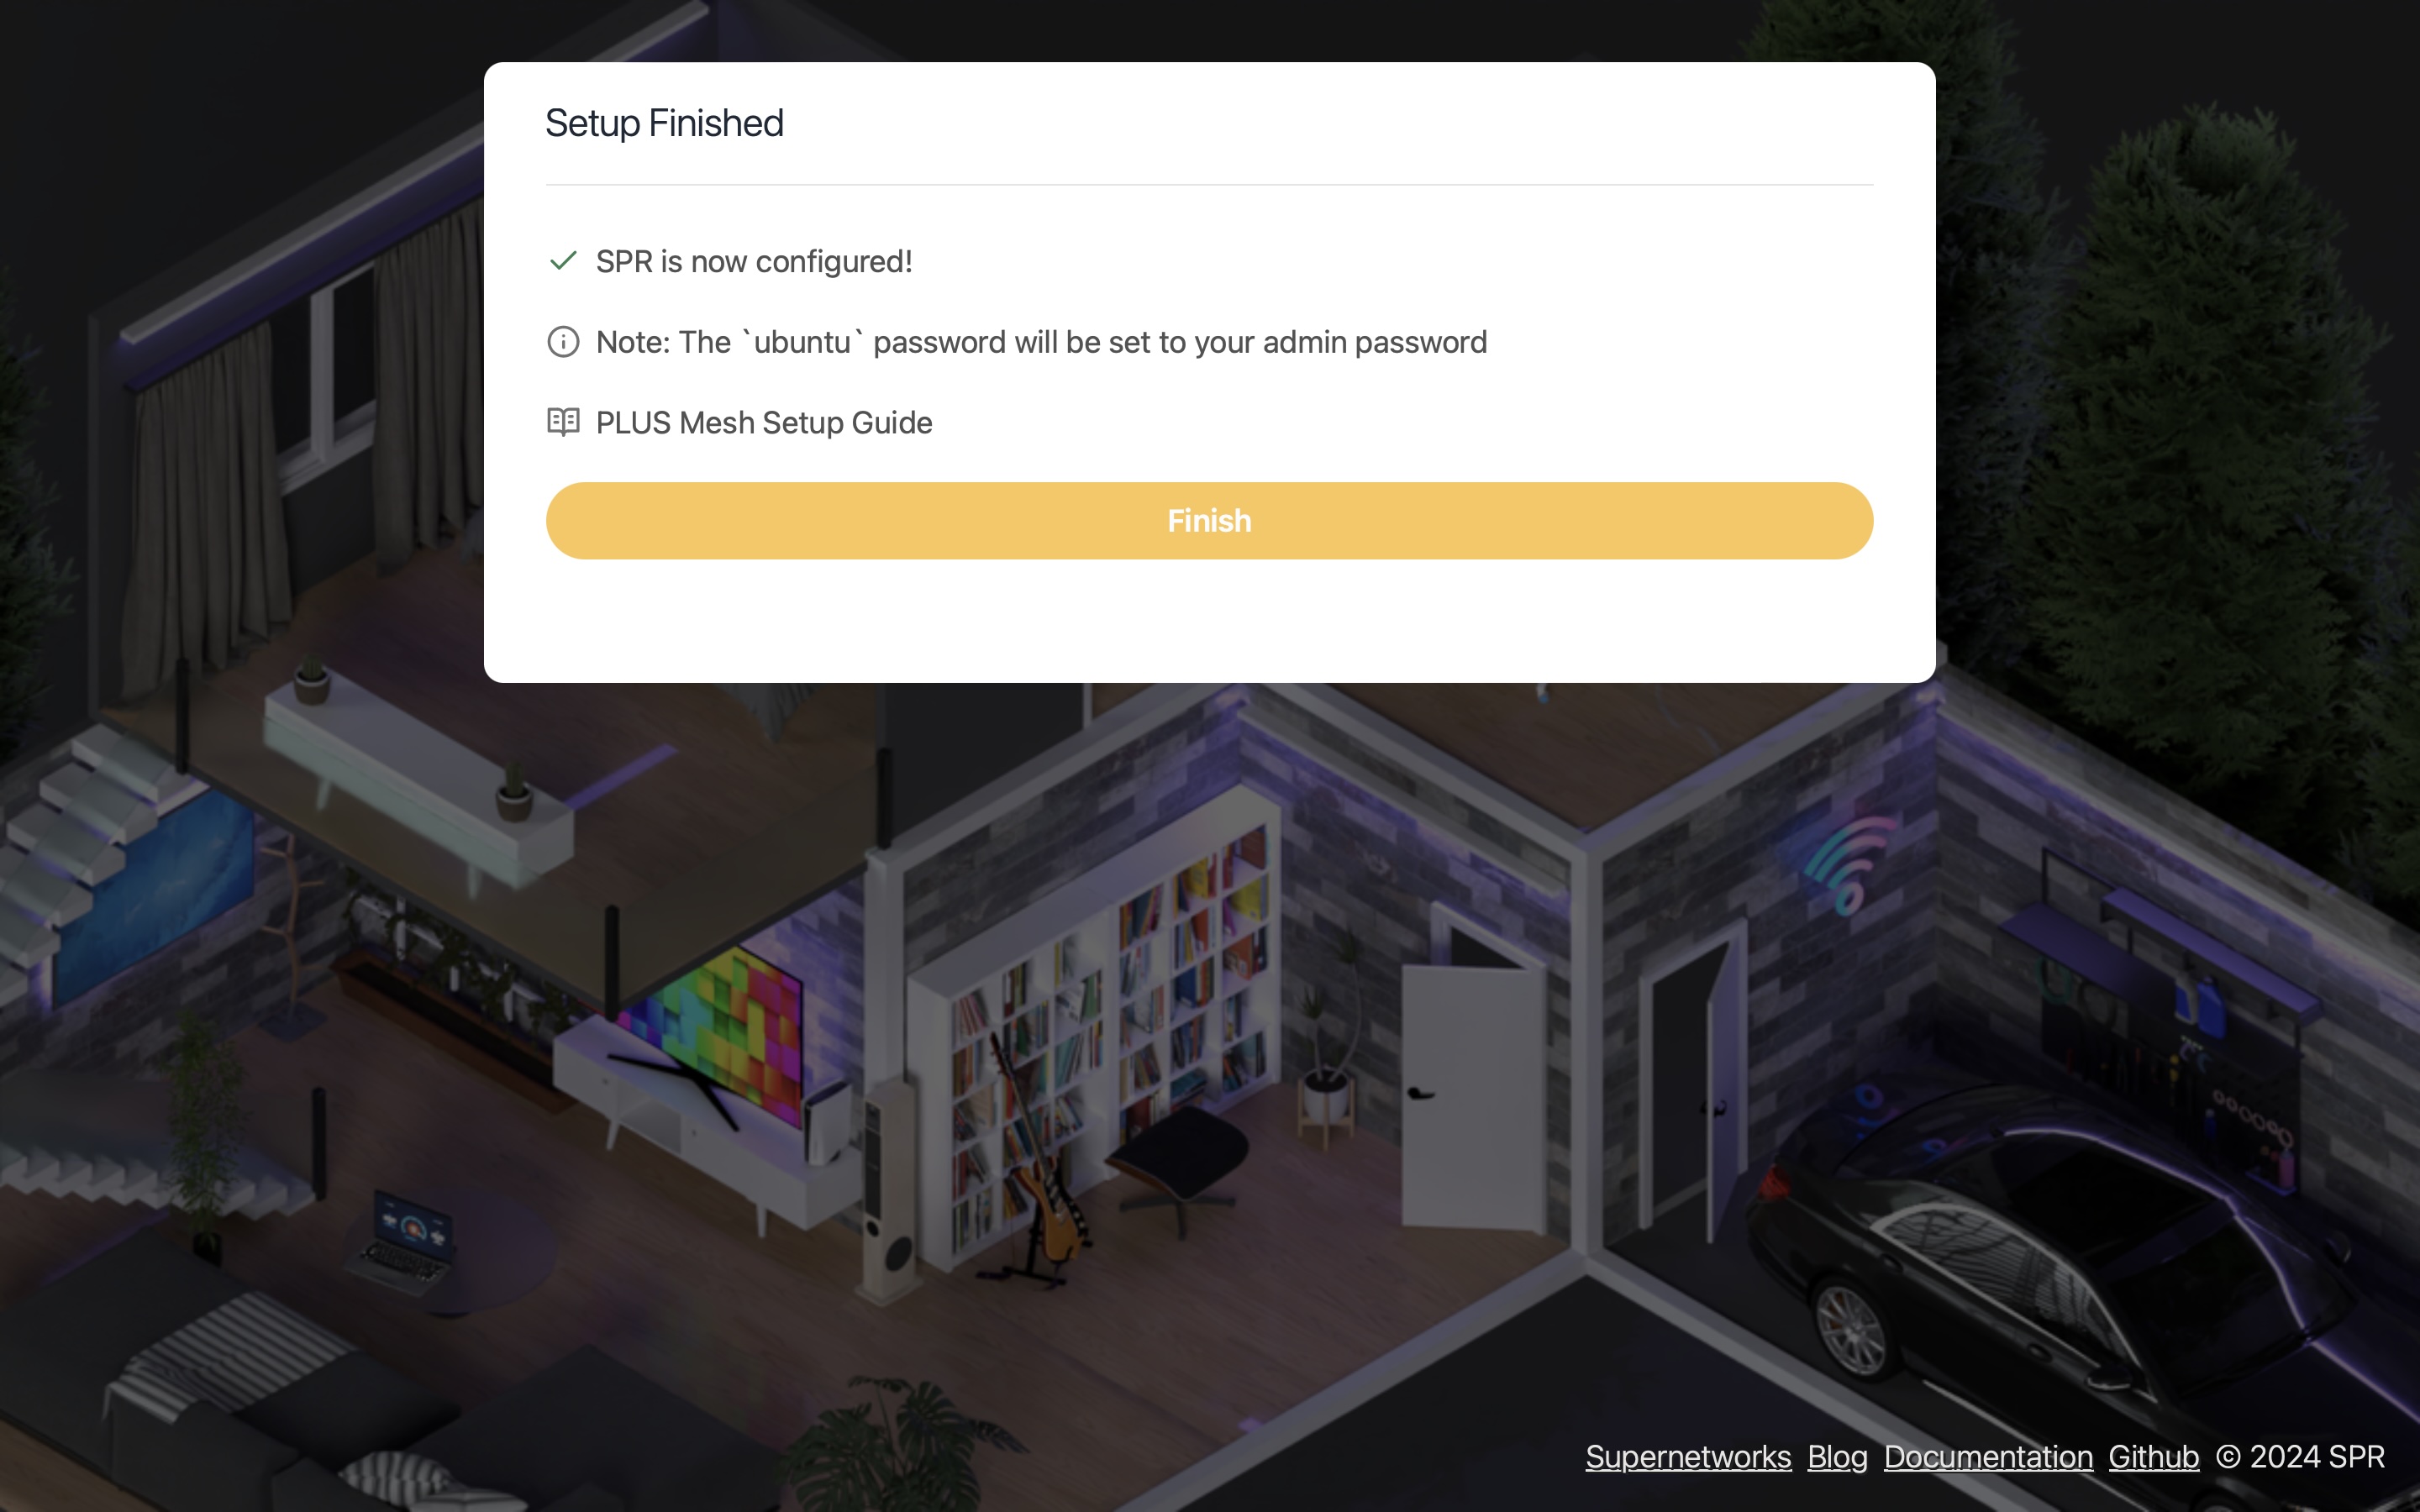
Setup Done
Your spr is now configured! Press finish to login, spr-setup wifi will now shutdown.
Post Setup Tasks
The dashboard will have links to add devices, setup wifi uplink or configure firewall services.
- Optional: Enable a WiFi uplink
- Enable DNS Ad Blocking and other DNS Blocklists for the network
- Configure VPN Devices
- Configure service reachability under the Firewall Services tab