WiFi 6 Pod
This product is our flagship hardware for running SPR.
Available Now
Order Page
About the Pods
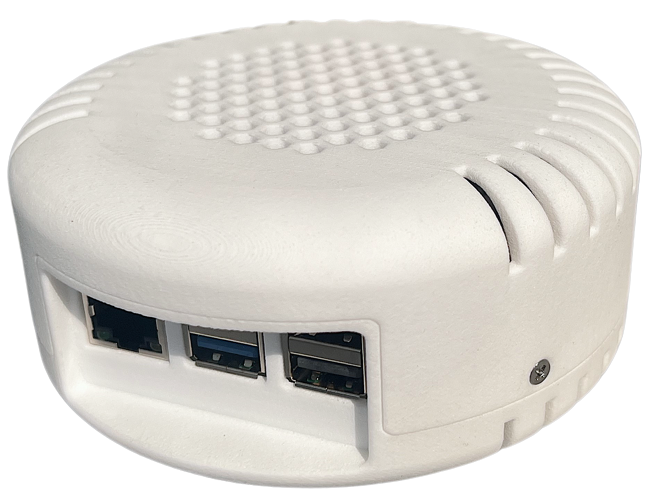
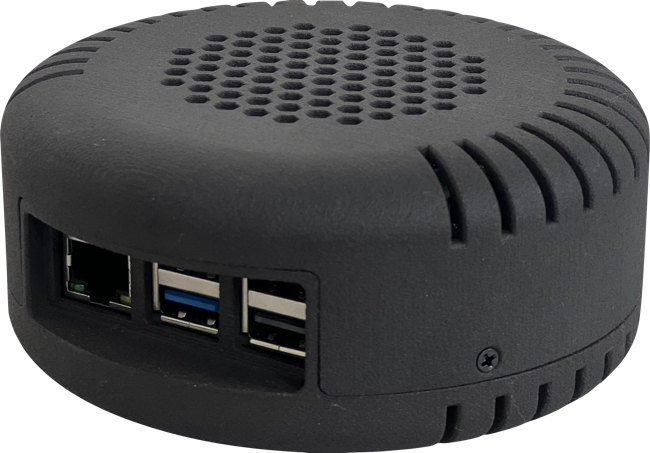
They started shipping in July 2024. Available in two colors, the pods have a 4.5” diamater and 2” height for the enclosure.
Key Product Features
- Simultaneously supports 2.4 Ghz and 5Ghz or 2.4 and 6ghz bands
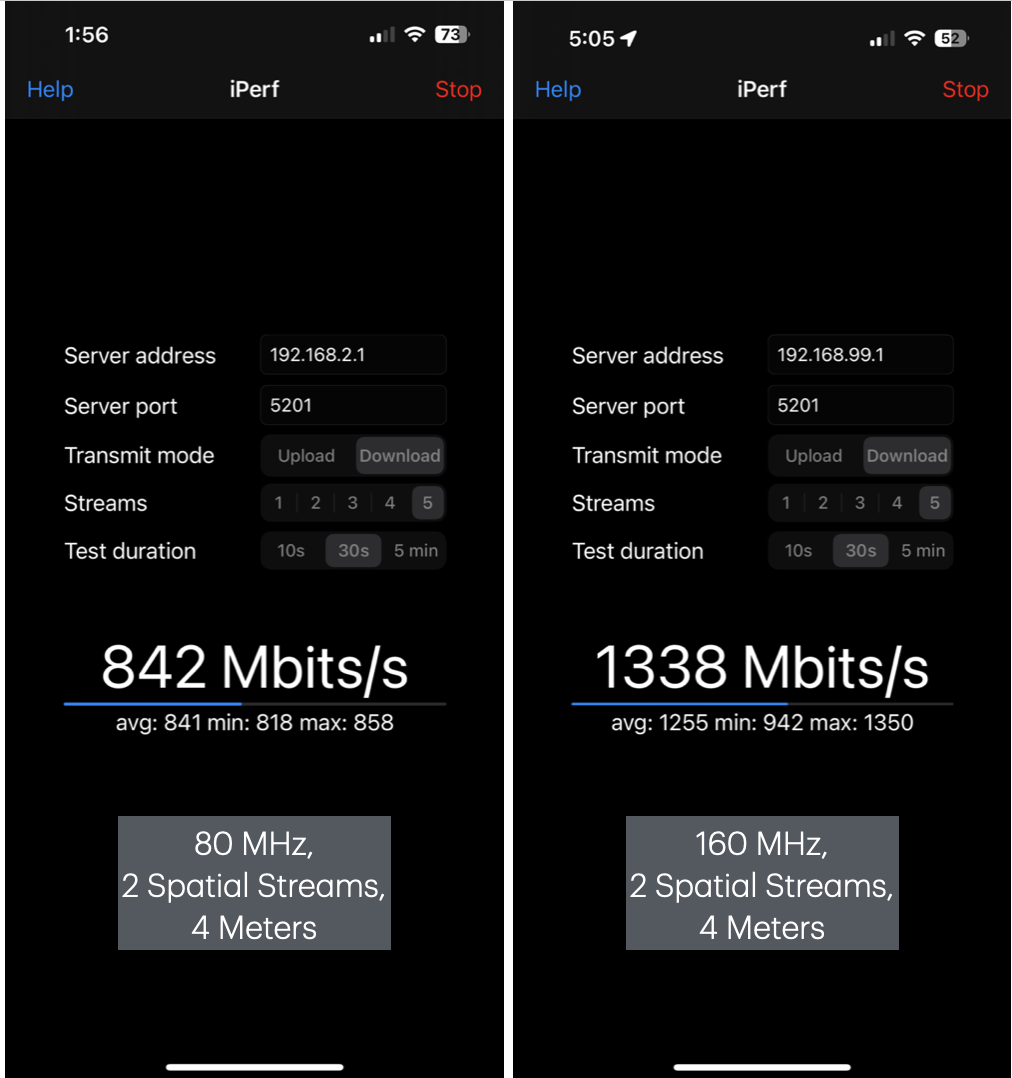
- WiFi 6 speeds, reaching over 1gbps for 160mhz channels with 2 spatial streams
- Enclosure strength makes it a good travel router
- Pi's built in wifi can be used for wireless uplink
What's Included Inside
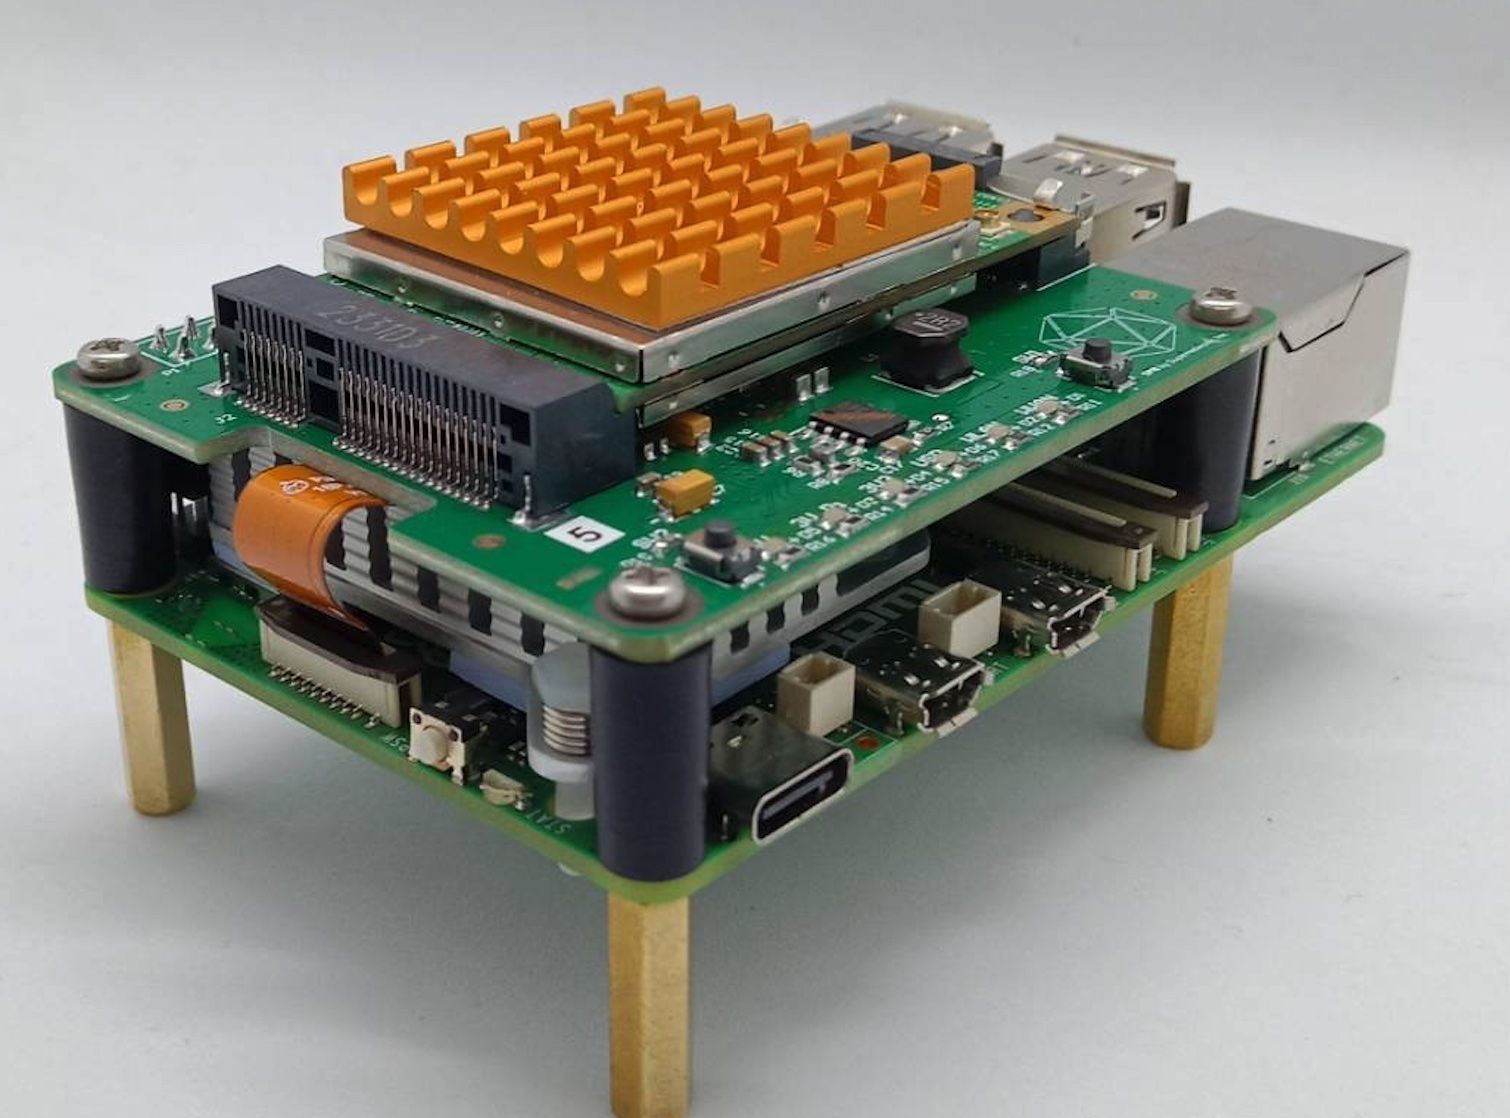
- The pod is built with the Raspberry Pi 5, extended with a custom built mPCIe hat
- Custom SLS Nylon Printed Enclosure available in White or Black
- 4GB PI5
- PI5 Power Supply
- PI5 Active Cooler
- Powered PI5 Hat sits on top and connects to the PCIe extension
- An Dual-band Dual-channel WiFi 6 mt7916 card for mPCIe
- 3x Laird FlexPIFA Antennas
- FFC Connector for PCIe
- 64GB USB Drive
Extendability
- Can be augmented with a WiFi 6 USB Dongle for tri-band support
- Can be augmented with a USB Ethernet Dongle for a second ethernet port
Upgradability
- You can swap out the PI5 for one with 8GB of RAM if you need more
- The WiFi card can be swapped out
- M.2 WiFi HAT available
- The USB Drive can be upgraded or replaced with an SSD
Power over Ethernet (POE)
- We have POE variants of the Pod
- IEEE 802.3af/at/bt, 25W Power Delivery,
- Need POE? Join the wait list
Setup guide
Install the SPR Pi 5 Image
For running SPR on a Raspberry Pi 5, the latest image is available here
You can download spr.img.xz and flash it with a tool such as the Raspberry Pi Imager, or if you prefer to write the image using the command line:
# On a mac, write the image to the external disk (rdiskX).
# Be careful to make sure you identify your removable drive correctly.
$ xzcat spr.img.xz | dd of=/dev/rdiskX bs=$[1024*1024]
Completing the Setup
- Plug in your Pi SPR to your local network using a ethernet cable, and boot
- On Pis, the built in WiFi hosts an open AP "sprlab-setup". Join the open AP and go to https://192.168.2.1 or https://spr.local.
- Alternatively, without connecting to the open AP, visit https://spr.local to run through the UI setup. This is a mDNS name, if it does not resolve: Check your router DHCP table to see if you can locate the Pi SPR or scan for it with ping/nmap.
- The setup will guide you through configuring your SPR networking and adding your first device, as well as setting a UI password.
Post Setup Tasks
- Optional: Enable a WiFi uplink
- Enable DNS Ad Blocking and other DNS Blocklists for the network
- Configure VPN Devices
- Configure service reachability under the Firewall Services tab
Follow the SPR Setup Guide
If you prefer to run on an existing image, or run from a fresh Ubuntu server install, you can Follow the SPR setup guide
Setup Debugging
Why is it loud?
- If the fan is spinning loudly, this indicates that the pi5 is not booting
Use the official pi5 power supply!
- The Pi5 requires their official power supply for USB boot
The Pod boots off of USB
- Boot your PI5 off of a USB drive. Optionally you can remove the cover (carefully), and boot off an SD card.
If you can not find SPR
- Check for the setup ap named
sprlab-setup - Try checking your router logs for the DHCP
Connecting with HDMI and a keyboard
- If all else fails you may need to disassemble the pod.
- Remove the power cable
- Remove the 3 screws on the enclosure and carefully open the top, to not detach the antennas
- Unscrew the four screws holding the HAT and PI5 to the enclosure
- Remove the pi5 from the enclosure and connect HDMI, a keyboard
If you do not see the wifi card
The mt7916 cards require 32-bit dma support. You can try to force this on with the following command, as the overlay setting may not always work on Ubuntu after an update:
fdtoverlay -i /boot/firmware/bcm2712-rpi-5-b.dtb -o /boot/firmware/bcm2712-rpi-5-b.dtb /boot/firmware/overlays/pcie-32bit-dma-pi5.dtbo
Also double check that /boot/firmware/config.txt contains dtparam=pciex1
Lastly, you may try to open the enclosure and ensure that the wifi card is in the slot and did not come lose